
Quickly Move Files from a Windows 10 PC to a Mac over your Home WiFi Network without migration assistant
Also: How to Share with your Mac if you use a Microsoft Account to Sign-in to your PC
If you need to transfer files from a Windows computer to an Apple/Mac computer, but Migration Assistant is not working or unavailable for any reason, you will be happy to know that it you can still copy your files quickly using a relatively simple process. You are able to connect the two computers on your home wifi network so they can share a folder, allowing you to transfer your files to your Mac with ease.
This method is faster than transferring the files using iCloud or an external hard drive because this way you only transfer the data once instead of twice.
These instructions will allow you to quickly transfer data from your Windows 10 PC to a MacBook Air, MacBook Pro, iMac, Mac mini, or any other (relatively) current device running Mac OS.
This can be done using the tools included in Windows 10 and Mac OS, so there is no need for additional software.
So, now that we have that out of the way – let’s get started!
Configure Your Windows PC For Sharing
First, if you haven’t done so already, you’ll need to configure your Windows 10 PC to share files on a network. Here’s how you can do that:
Click the Windows button on your taskbar and open Settings (the gear).
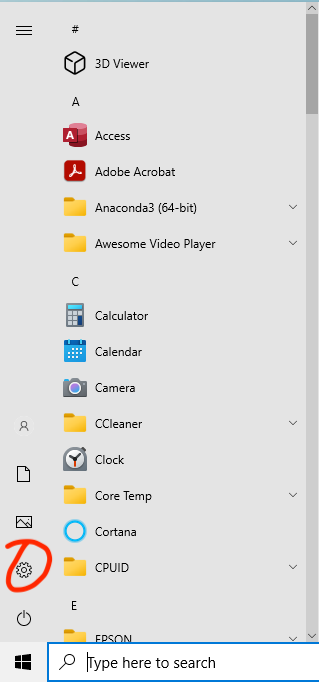
Within Settings, click Network & Internet in the top row.
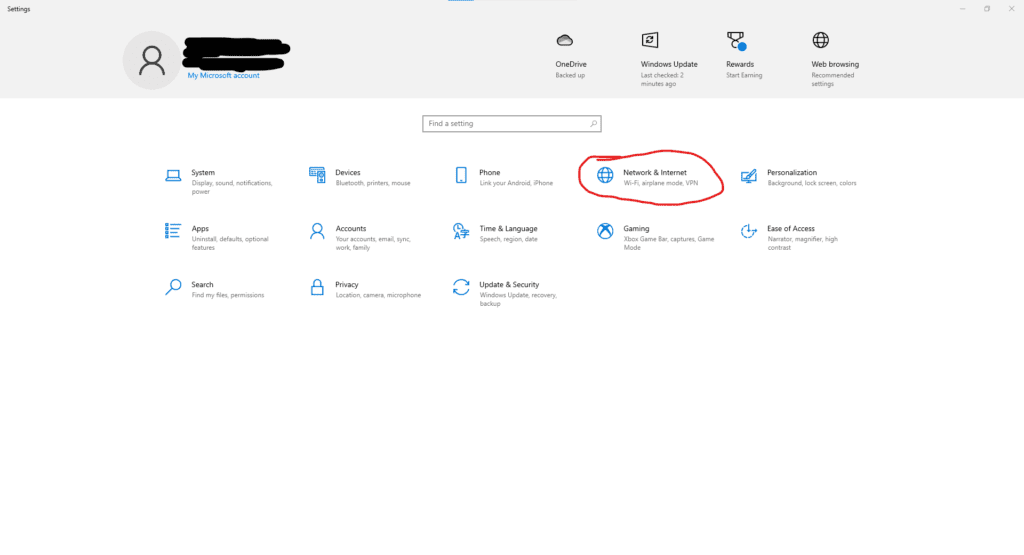
When you open the Network & Internet menu, you should be looking at something like this:
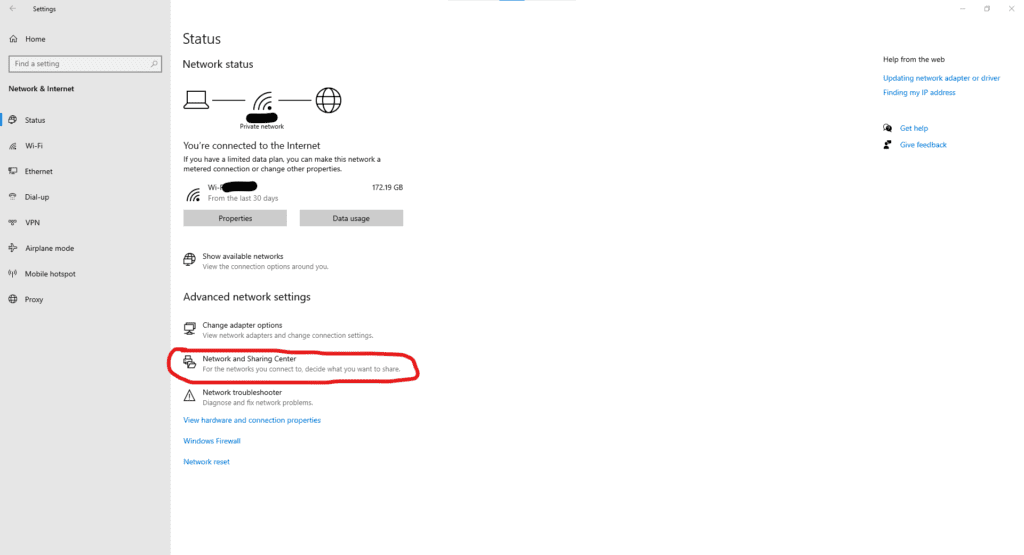
Under the Advanced Network Settings heading, you should see an option for Network and Sharing Center. Click that.
Now you should see something like this:
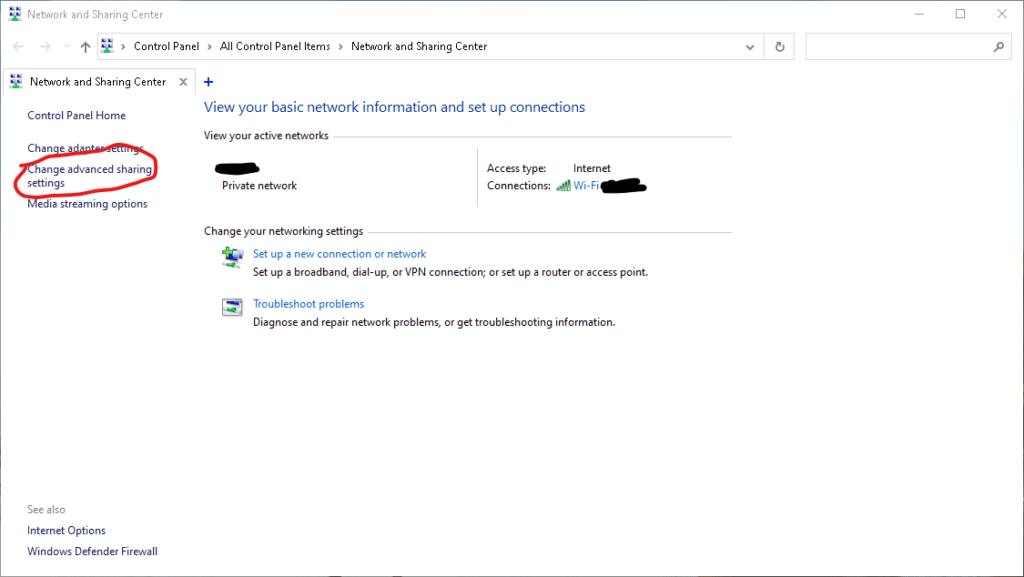
See the menu on the left? Find “Change advanced sharing settings” and click it.
Now, you should see this menu:
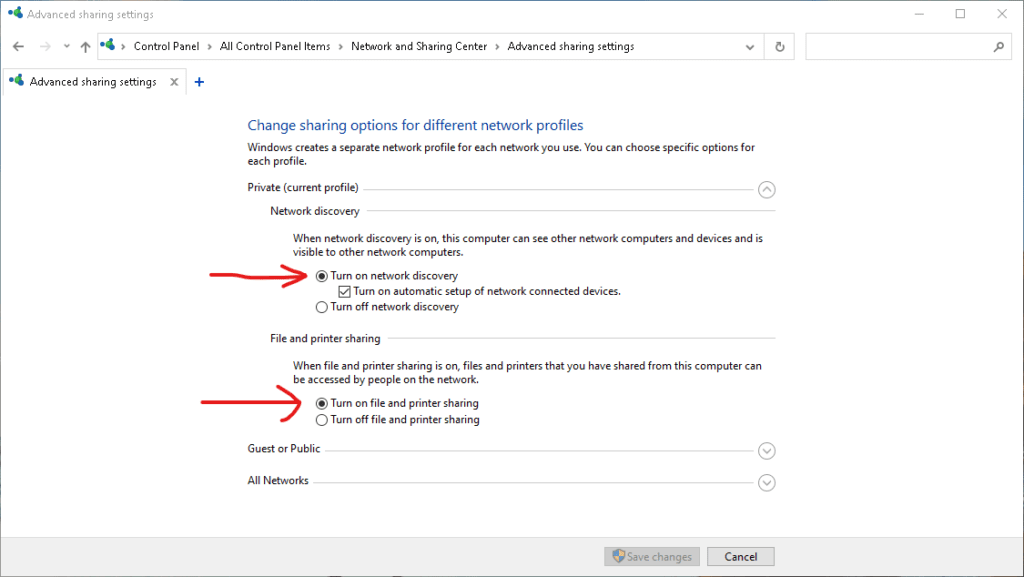
Make sure that network discovery is turned on for the type of network you use (usually Private; you can tell which one you use because it will say “current profile” next to it). Also make sure that file and printer sharing are turned on. Make sure to save your changes.
Also, it’s a good idea to check under the All Networks tab and make sure you are using an encrypted file sharing connection and password protected sharing. Turning these settings on will ensure that you can transfer your files safely over your network. Save your changes.

Congrats! You have configured your Windows 10 PC to share files over your home network. Now, we just have a little bit more we need to do on your PC before we head over to your Mac.
Set Up a Folder to Use to Share Data with your Mac
Now that your PC has been configured to share, we need to make sure that the folder you would like to share with your Mac (ie., the folder you plan to use to transfer your files) is set up to share. This folder will act as a go-between that will allow you to easily transfer your data from your PC to your Mac simply by copy-and-pasting or dragging-and-dropping.
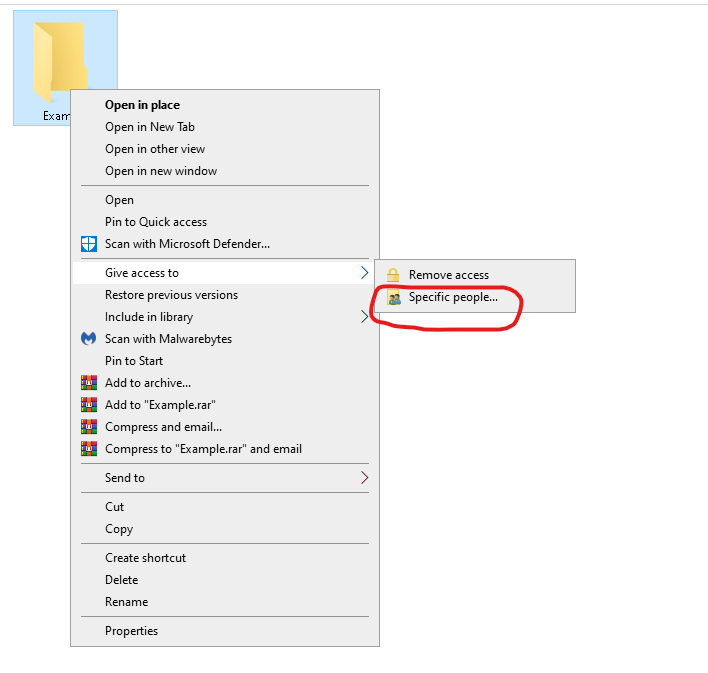
So, create a new folder if you’d like (or use a pre-existing one if you’d prefer), then right click on the folder, find “Give Access To…”, then select “Specific People.”
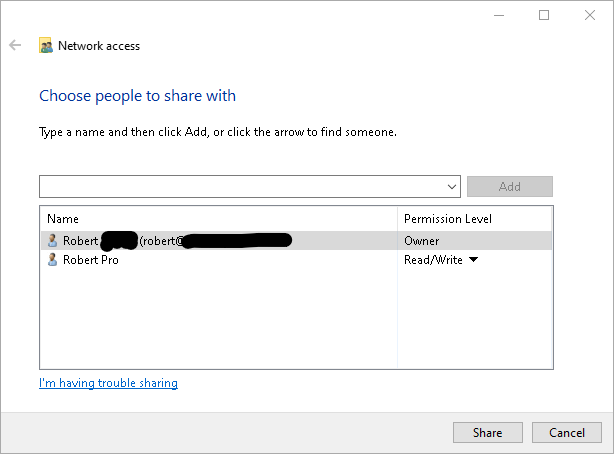
Next, you will see a window titled “Choose people to share with” that will allow you to select a user or users on your PC to share your files with. This will be the PC user account that you will use to transfer the files, so you need to make sure that it’s an administrative account that you have access to.
If you use a Microsoft account as your only administrative account on your PC, then the next section is for you. If you use a local account that is not connected to Microsoft, you can skip this section.
How to Transfer Files From PC to Mac If You Use a Microsoft Account
At this point, if you use a Microsoft account to access your Windows PC, then it’s a good idea to create a new user account to use for sharing. Microsoft accounts, particularly those with two-factor authentication activated, often cause users to run into problems when they are connecting from their Mac. So, it’s usually just easiest to create a new administrative user account to use for sharing. Luckily, that can be done within the menu you just opened to give access to specific people.
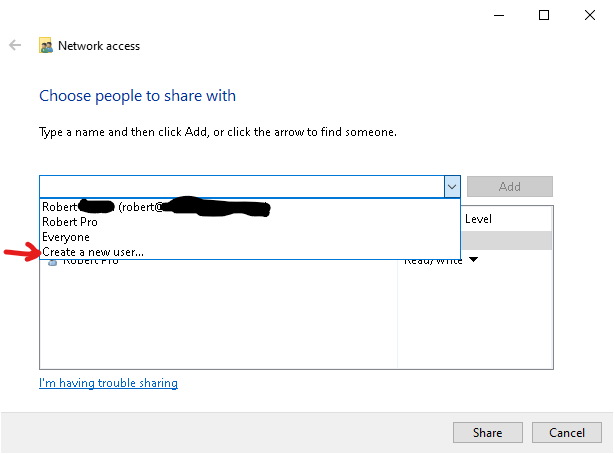
First, click the drop-down menu in the “Choose people to share with” window and select the “Create a new user” option.
After you click Create a new user, you will be brought to this screen:
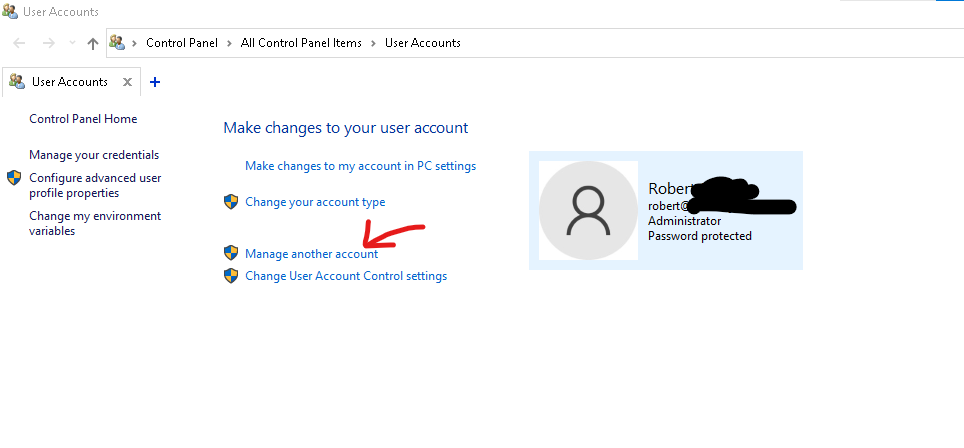
Click “Manage Another Account” to proceed with setting up a new user account.
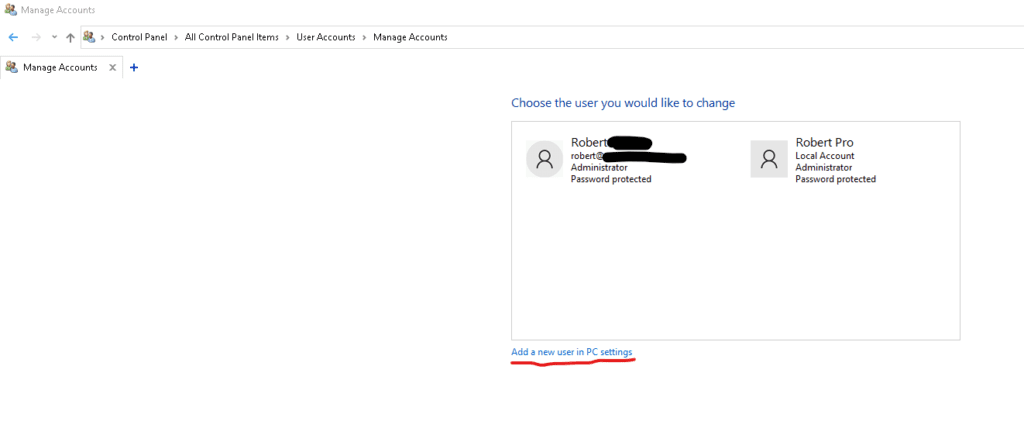
Now you will be brought to this screen, where you will select “Add a new user in PC settings”
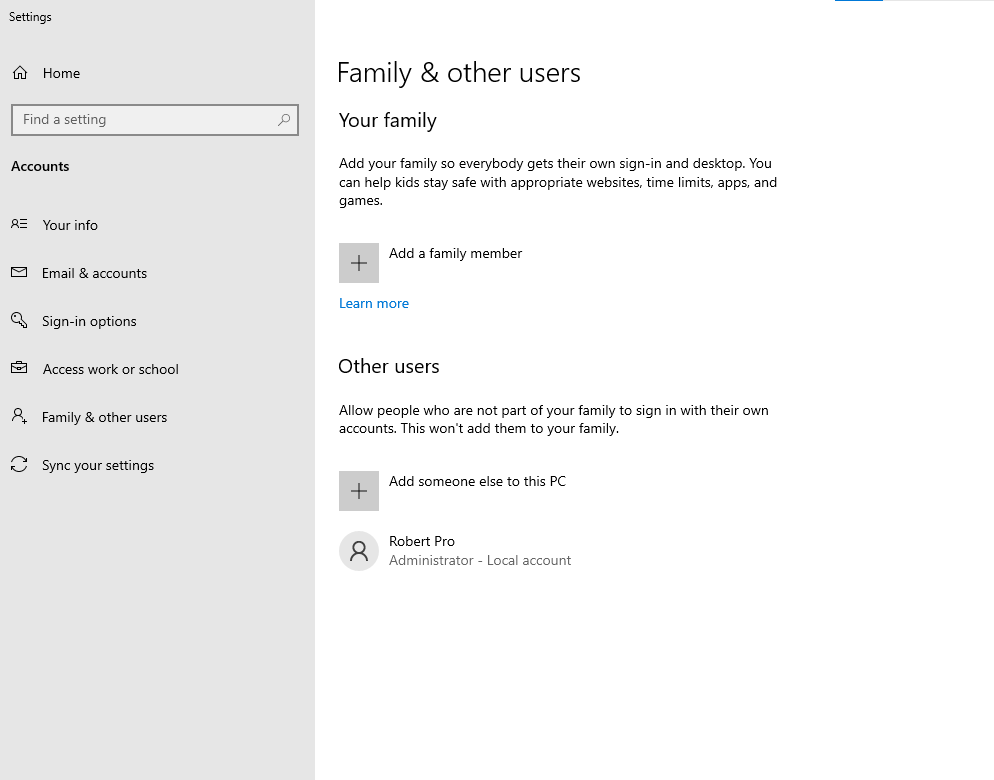
Now you will be brought to the Family & other users menu within Settings. Look under the section labelled “Other users” and click “Add someone else to this PC”
It is now time to go through the actual process of adding a new user to your PC. This is very easy and only takes a few steps, but there are a few choices that we will need to make along the way.
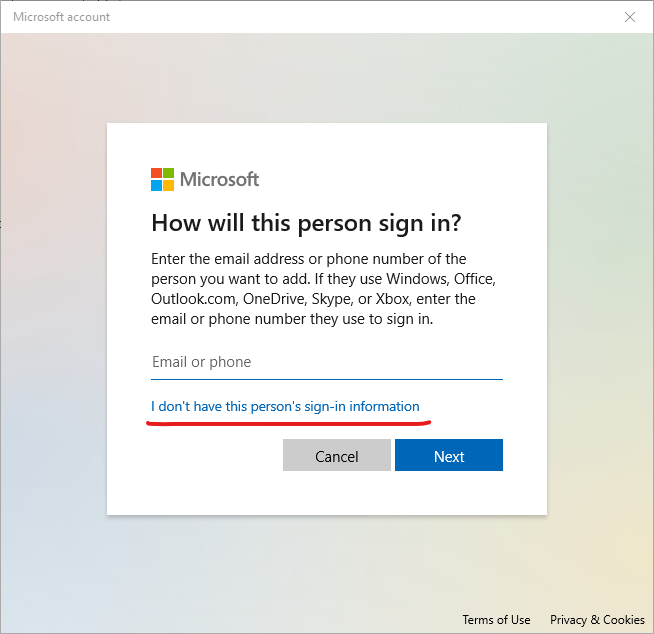
First, you will see this screen asking how the person (new user) will sign in, and will ask for an email or phone number. Don’t worry, you don’t need an email or phone number to add a new user. Instead, just click “I don’t have this person’s sign-in information” and proceed.
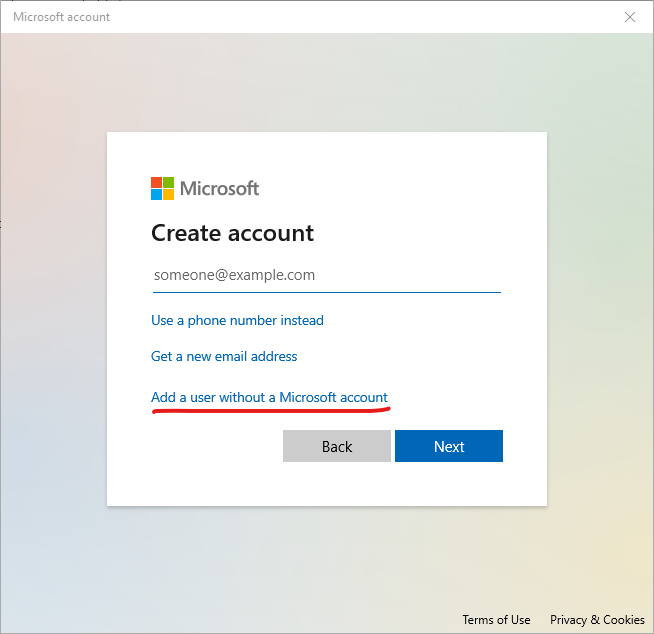
Now, it doesn’t give up easily and is going to ask you again for an email address. Don’t let it push you around and click “Add a user without a Microsoft account”.
Now it is time to choose a username and password for your new user account. You can choose whatever name you want, just make sure that your password is secure (use letters, numbers and special characters) and memorable.

When you enter your password, Windows will then ask you to set up security questions for your new user account. Go ahead and complete this step and click next.
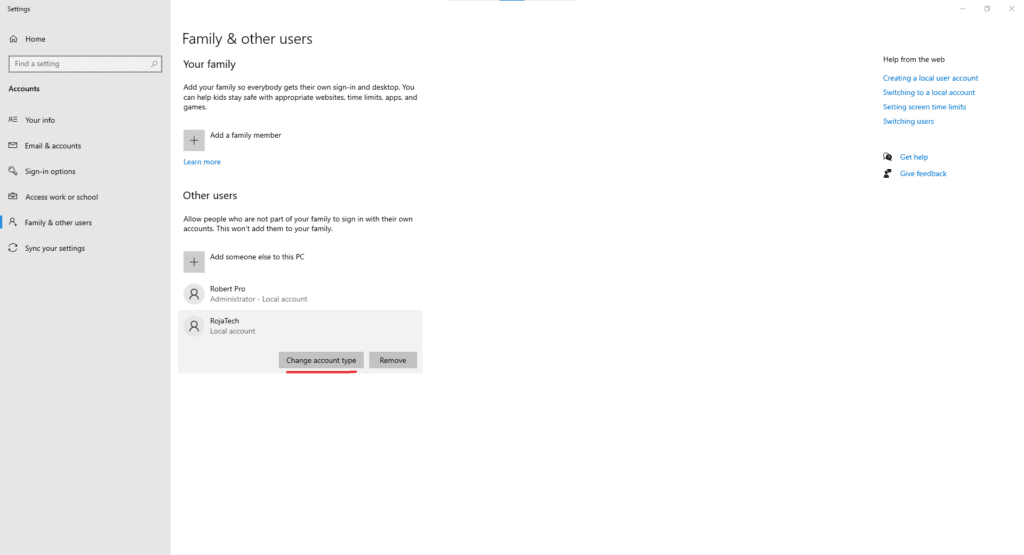
And there you go, you have now set up a new user account on your Windows PC that you can use for sharing with your Mac. Now, you should see the Family & other users screen again, but this time, you should see your new local account listed in the Others Users section, like in the example below.
But to share with your Mac, your new account needs Administrator privileges. This is easy to do from the Family & other users screen where we are. Simply we click “Change account type” and follow the on-screen instructions to change your new local account into an Administrator Local Account.
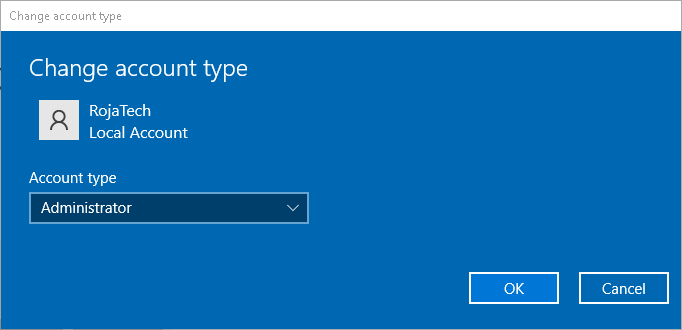
When you click “Change account type,” you’ll see a Window that looks like this:
Now that you have set up your new user account to use for sharing, it’s time to head back to the folder you want to share with your Mac, right click and re-open the menu option for “Give Access To” — “Specific People”.
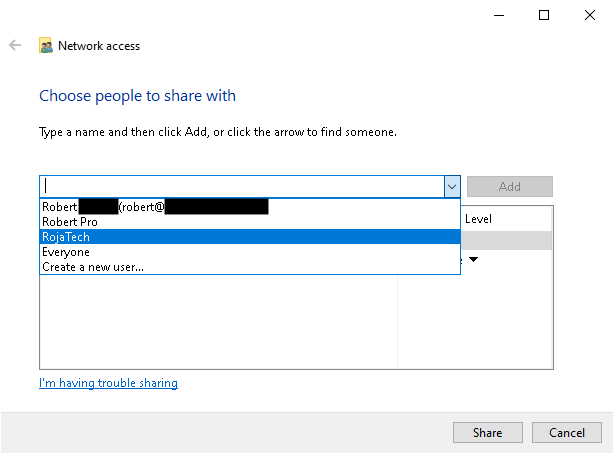
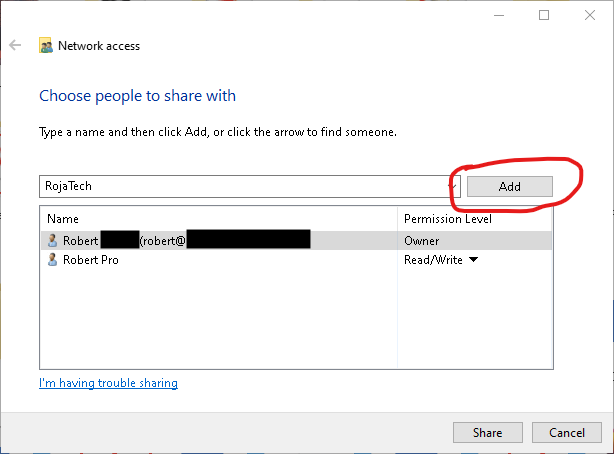
Then on the “Choose people to share with” screen, click the drop-down menu to select the new administrator account that you made in the last step. Then click Add.
Local Account Users - Welcome Back. You Can Pick Up Here:
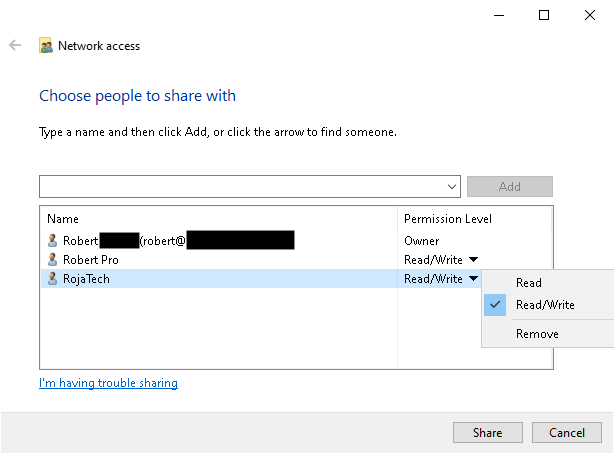
Make sure the user account that you are using to share has Read/Write permission before proceeding to the next step.
Once you’ve done that, click Share.
After clicking Share, you’ll be brought to a screen confirming that the folder you wished to share is now shared to the user you selected. Click Done, and now we’re ready to head over to your Mac!
Connect your Mac to your Windows PC Over WIFI
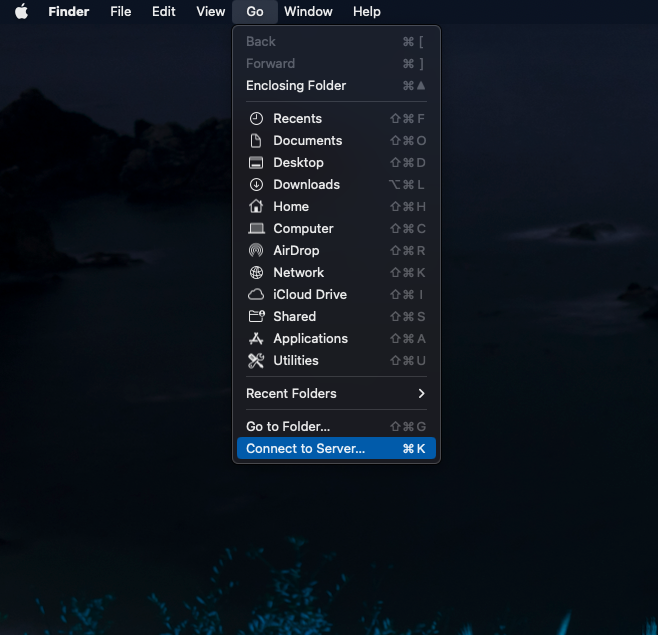
The first step on your Mac is to open Finder.
Under the Go menu in Finder, click “Connect to Server.”
Next, you will get a simple prompt to Connect to Server. This can be accomplished two different ways. You can either enter smb://YOUR-WINDOWS-COMPUTER-NAME or smb://WINDOWS-PC-IP-ADDRESS (no dashes).
Personally, I use my Windows computer name since that seems to work better for me.
(Note that I am not talking about your Windows account log-in name, I’m talking about your COMPUTER NAME. On your Windows computer, you can find your computer name by going to Start Button -> Settings -> System -> About. In the About section, you will see your computer name listed as the Device Name.)

If the connection is successful, you should see a box displaying the following message. If everything looks right, go ahead and click connect.

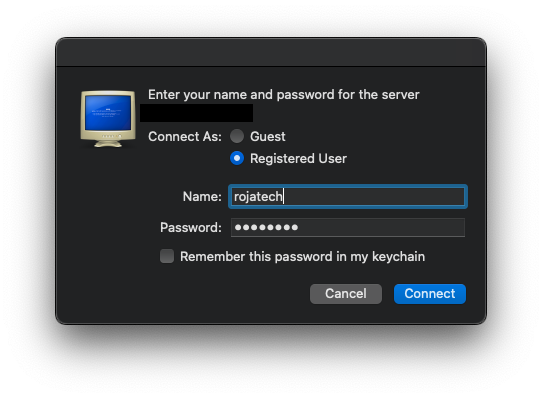
Next, you’ll be brought to a screen where you will enter the username and password of the administrative user account that you created on your Windows computer (or that you already had to begin with):
If all goes well, then you should see something like this in your Finder window, showing that you have connected to your Windows computer and can begin accessing its files from your Mac within Finder:
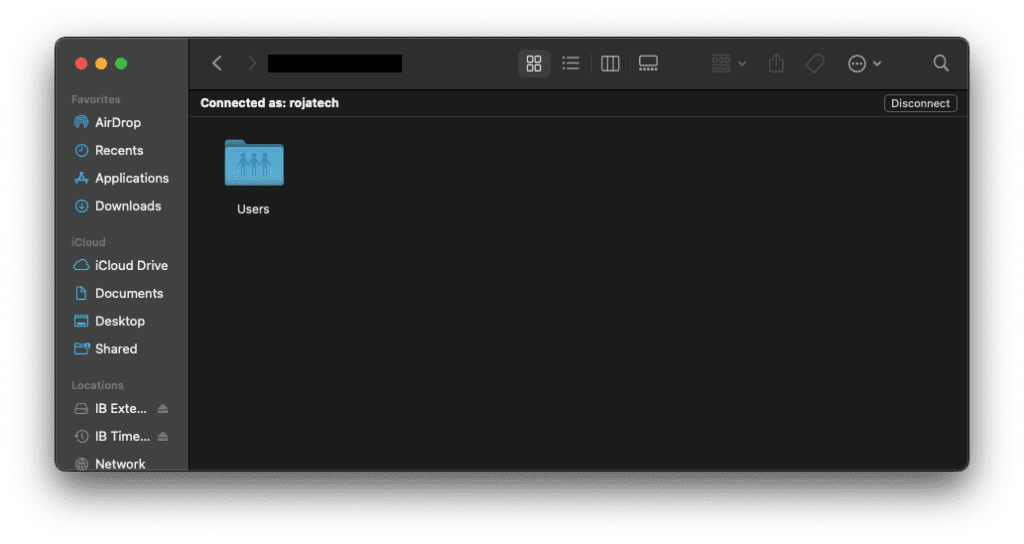
From here, the process of actually accessing your files will vary for everyone depending on which folder you shared and where it is located on your Windows computer. Depending on where it is stored, you may have to navigate a little to find the files you need, probably starting at the Users folder as shown in the example above. But you should be able to get to them now from your Mac.
Once you find the files, it’s as easy as copy-and-pasting or dragging and dropping them to your iCloud Documents folder so that they are now located on your Mac for easy future access.
The files will transfer quickly over your home wifi, allowing you to move or copy your files directly from your Windows PC to your Mac without having to upload them to iCloud first. This can be very helpful and quick if you have a large amount of data (ie., over 1 gb) you wish to transfer between your Windows and Mac computers.
Thank you for reading!
Please Contact Us if you have any questions.